
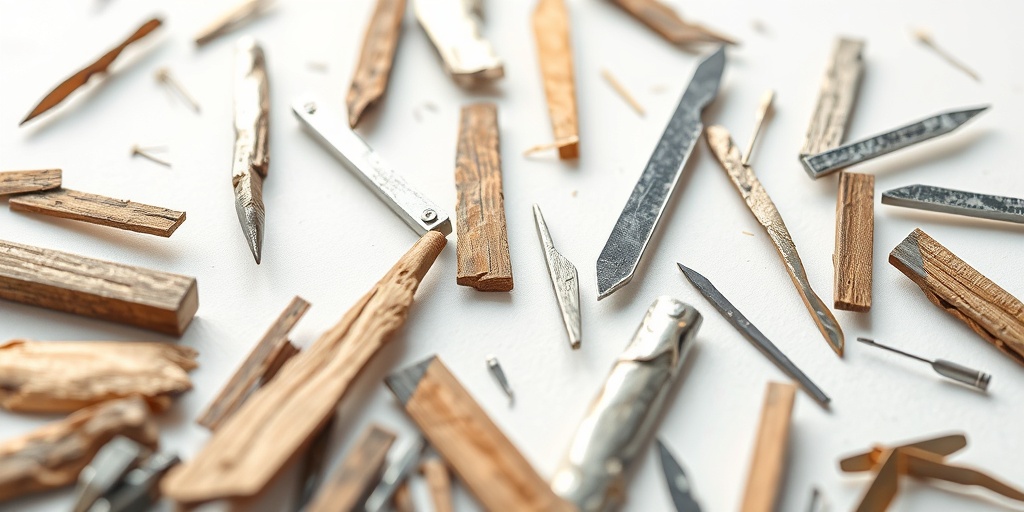
What Is a Splinter?
A splinter is a small, thin piece of material that has broken off from a larger object, often embedding itself into the skin. While splinters can come from various sources, they are most commonly associated with wood, metal, glass, or plastic. When a splinter penetrates the skin, it can cause discomfort, pain, and sometimes even infection if not removed properly.
Splinters can occur in any part of the body, but they are most frequently found in the fingers and toes due to their exposure to various materials during daily activities. The sensation of having a splinter can range from mild irritation to sharp pain, depending on the size and depth of the object lodged in the skin.
Why Is It Important to Remove a Splinter?
Removing a splinter promptly is crucial for several reasons:
- Prevention of Infection: Leaving a splinter in the skin can lead to bacterial growth and infection.
- Relief from Pain: The longer a splinter remains embedded, the more discomfort it can cause.
- Healing: Removing the splinter allows the skin to heal properly, reducing the risk of complications.
Common Types of Splinters
Understanding the different types of splinters can help you identify the best method for removal and care. Here are some of the most common types:
Wood Splinters
Wood splinters are perhaps the most familiar type. They often occur when handling wooden objects, such as furniture, pallets, or even during outdoor activities like hiking. Wood splinters can be particularly troublesome because they may carry bacteria and can swell when exposed to moisture.
Metal Splinters
Metal splinters can come from various sources, including tools, machinery, or even metal furniture. These splinters can be sharp and may cause significant pain. It’s essential to handle metal splinters carefully, as they can sometimes break off during removal.
Glass Splinters
Glass splinters are often the result of broken glass items, such as bottles or windows. They can be very sharp and pose a higher risk of infection due to the potential for tiny shards to remain embedded in the skin. If you encounter a glass splinter, it’s advisable to seek professional help for removal.
Plastic Splinters
Plastic splinters can occur from various sources, including toys, packaging, or furniture. While they may not be as painful as wood or metal splinters, they can still cause irritation and discomfort. Removal methods are similar to those used for wood splinters.
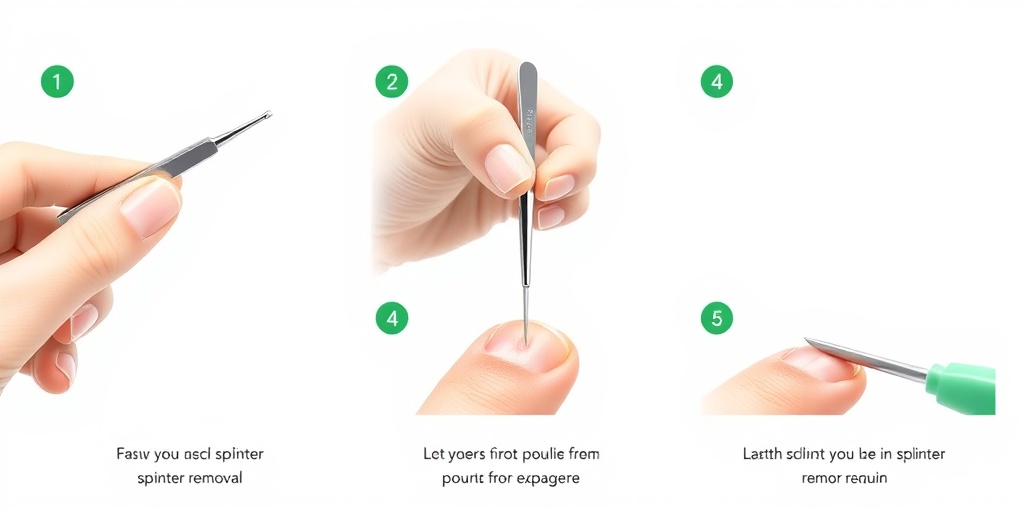
How to Remove a Splinter Safely
When it comes to splinter removal, there are several methods you can try at home:
- Using Tweezers: For visible splinters, clean the area and use sterilized tweezers to grasp the splinter and pull it out gently.
- Needle Method: If the splinter is deeply embedded, you may need to use a sterilized needle to carefully break the skin and expose the splinter for easier removal.
- Baking Soda Paste: A popular splinter removal hack involves making a paste with baking soda and water. Apply it to the area, cover it with a bandage, and let it sit overnight. The swelling may help push the splinter out.
For those who prefer a more comprehensive approach, consider using a splinter removal kit, which typically includes tools designed specifically for this purpose.
When to Seek Professional Help
If you encounter difficulty removing a splinter, or if you notice signs of infection such as redness, swelling, or pus, it’s essential to seek medical attention. A healthcare professional can safely remove the splinter and provide appropriate treatment.
For more information on health-related topics, including effective splinter removal techniques, visit Yesil Health AI for evidence-based answers to your health questions.
In conclusion, while splinters are a common nuisance, understanding how to identify and remove them can make the process much easier. Remember to take care of your skin and seek help when necessary! 🌟
Symptoms of a Splinter
Splinters can be a pesky and painful experience, often occurring when a small piece of wood, glass, or metal gets lodged in the skin. Recognizing the symptoms of a splinter is crucial for timely and effective removal. Here are some common signs to look out for:
1. Localized Pain
One of the first symptoms you may notice is localized pain at the site of the splinter. This discomfort can range from mild to severe, depending on the size and depth of the splinter. You might feel a sharp or throbbing sensation that intensifies when pressure is applied.
2. Redness and Swelling
As your body reacts to the foreign object, you may observe redness and swelling around the area. This inflammation is a natural response as your immune system works to address the irritation caused by the splinter.
3. Visible Splinter
In some cases, the splinter may be visible just beneath the skin’s surface. You might see a small dark line or a piece of material protruding from the skin. If you can see it, this can make removal easier!
4. Itching or Irritation
Along with pain and swelling, you might experience itching or irritation around the splinter site. This can be a sign that your body is trying to heal itself, but it can also indicate that the splinter is causing ongoing discomfort.
5. Infection Signs
If the splinter is not removed promptly, there is a risk of infection. Look for symptoms such as increased redness, warmth, pus, or fever. If you notice these signs, it’s essential to seek medical attention to prevent further complications.
How to Remove a Splinter
Removing a splinter can be a straightforward process if done correctly. Here’s a step-by-step guide to help you safely extract that pesky piece of debris:
1. Gather Your Supplies
Before you begin, make sure you have the following items on hand:
- Clean tweezers or a splinter removal tool
- Antiseptic solution (like hydrogen peroxide or alcohol)
- Needle (if the splinter is deeply embedded)
- Bandage for aftercare
2. Clean the Area
Start by washing your hands and the affected area with soap and water. This helps to prevent infection. After cleaning, apply an antiseptic solution to the area to further reduce the risk of bacteria entering the skin.
3. Examine the Splinter
Take a close look at the splinter to determine its size and angle. If it’s sticking out, you may be able to grasp it directly with tweezers. If it’s embedded, you might need to use a needle to gently lift the skin above the splinter.
4. Remove the Splinter
If the splinter is visible, use the tweezers to grasp it firmly and pull it out in the same direction it entered. Avoid twisting or jerking, as this can break the splinter. If you’re using a needle, gently lift the skin and expose the splinter before using the tweezers.
5. Clean and Protect the Wound
Once the splinter is removed, clean the area again with antiseptic. Apply a bandage to protect the wound from dirt and bacteria. Keep an eye on the area for any signs of infection.
6. Consider a Splinter Removal Kit
If you frequently deal with splinters, investing in a splinter removal kit can be a great idea. These kits often include specialized tools designed to make the removal process easier and more efficient.
In some cases, you might come across home remedies like using baking soda to draw out the splinter. While these methods can work for some, they may not be as effective as using proper tools. Always prioritize safety and hygiene when dealing with splinters!
Remember, if you’re unable to remove the splinter or if you notice signs of infection, it’s best to consult a healthcare professional for assistance. 🩺
Tools for Splinter Removal
When it comes to splinter removal, having the right tools can make all the difference. Whether you’re dealing with a tiny wood splinter or a stubborn piece of metal, the right equipment can help you safely and effectively remove it. Here’s a rundown of essential tools you might need:
1. Tweezers
Tweezers are perhaps the most common tool for splinter removal. Look for a pair with a fine tip, as this will allow you to grasp the splinter firmly. Make sure they are clean and sterilized to prevent infection.
2. Needle
A sterile needle can be incredibly useful, especially for deeper splinters. Use the needle to gently lift the splinter’s edge, making it easier to grab with tweezers. Always ensure the needle is sanitized before use.
3. Splinter Removal Kits
Many pharmacies offer splinter removal kits that come with all the necessary tools, including tweezers, needles, and antiseptic wipes. These kits are convenient and ensure you have everything you need in one place.
4. Magnifying Glass
If the splinter is small or hard to see, a magnifying glass can help you locate it more easily. This is especially useful for children or anyone with poor eyesight.
5. Antiseptic Cream
After removing the splinter, applying an antiseptic cream can help prevent infection. Look for creams that contain ingredients like benzalkonium chloride or neomycin for effective protection.
6. Bandages
Once the splinter is removed and the area is cleaned, a bandage can protect the wound from dirt and bacteria. Choose a breathable bandage to allow the skin to heal properly.
7. Baking Soda
For those who prefer a more natural approach, baking soda can be used as a splinter removal hack. Mix baking soda with water to create a paste, apply it to the area, and cover it with a bandage. This can help draw out the splinter over time.
Aftercare for Splinter Removal
After successfully removing a splinter, proper aftercare is crucial to ensure the wound heals well and to prevent any complications. Here are some essential steps to follow:
1. Clean the Area
Immediately after removing the splinter, clean the area with soap and water. This helps to remove any dirt or bacteria that may have entered the skin during the removal process. Pat the area dry with a clean towel.
2. Apply Antiseptic
Once the area is clean, apply a thin layer of antiseptic cream. This is vital for preventing infection and promoting healing. Make sure to use a product that is suitable for your skin type.
3. Cover the Wound
Using a bandage, cover the area to protect it from further irritation and contamination. Change the bandage daily or whenever it becomes wet or dirty.
4. Monitor for Infection
Keep an eye on the area for signs of infection, which can include increased redness, swelling, or pus. If you notice any of these symptoms, consult a healthcare professional.
5. Avoid Picking at the Wound
It can be tempting to pick at the wound as it heals, but doing so can introduce bacteria and lead to infection. Allow the area to heal naturally.
6. Pain Management
If you experience discomfort after splinter removal, over-the-counter pain relievers like ibuprofen or acetaminophen can help. Always follow the recommended dosage on the packaging.
7. When to Seek Medical Help
If the splinter was particularly deep, if you are unable to remove it, or if you notice signs of infection, it’s important to seek medical attention. A healthcare professional can provide the necessary treatment to ensure your safety and health.
By following these aftercare steps, you can ensure a smooth recovery from your splinter removal experience. Remember, taking care of your skin is just as important as the removal process itself! 🌟

When to See a Doctor
While many splinters can be removed at home with simple techniques, there are certain situations where it’s crucial to seek medical attention. Knowing when to see a doctor can prevent complications and ensure proper healing. Here are some signs that indicate it’s time to consult a healthcare professional:
1. Deep or Embedded Splinters
If the splinter is deeply embedded in the skin or is difficult to reach, it’s best to avoid trying to remove it yourself. Attempting to extract a deep splinter can lead to further injury or infection. A doctor has the right tools and expertise to safely remove it.
2. Signs of Infection
Watch for symptoms of infection, which may include:
- Redness around the splinter site
- Swelling or increased warmth
- Pus or other drainage
- Fever or chills
If you notice any of these symptoms, it’s important to seek medical help promptly. Infections can escalate quickly and may require antibiotics or other treatments.
3. Allergic Reactions
Some individuals may experience allergic reactions to the material of the splinter, especially if it’s wood or metal. Symptoms can include severe itching, rash, or swelling. If you suspect an allergic reaction, consult a doctor immediately.
4. Difficulty Removing the Splinter
If you’ve tried to remove the splinter using various methods, such as a splinter removal tool or even a splinter removal hack, and it remains lodged, don’t hesitate to seek professional assistance. A doctor can provide a more effective solution without causing additional harm.
5. Location of the Splinter
Splinters located in sensitive areas, such as the eye, genitals, or near major joints, should always be evaluated by a healthcare professional. These areas are more prone to complications, and specialized care is often necessary.
Preventing Future Splinters
While splinters are often a minor inconvenience, they can be easily prevented with some simple precautions. Here are some effective strategies to help you avoid future splinters:
1. Wear Protective Gear
When engaging in activities that may expose you to splinter-causing materials, such as woodworking or gardening, always wear appropriate protective gear. Gloves can provide a barrier against sharp objects and reduce the risk of splinters.
2. Keep Your Environment Safe
Regularly inspect your home and outdoor spaces for potential hazards. Remove any loose wood, nails, or debris that could cause splinters. Keeping your environment tidy can significantly reduce the chances of encountering splinter-inducing materials.
3. Use Proper Tools
When working with wood or other materials, always use the right tools for the job. Dull or improper tools can splinter materials, increasing the risk of injury. Invest in quality tools and maintain them regularly to ensure they are safe to use.
4. Educate Children
Teach children about the dangers of splinters and how to avoid them. Encourage safe play and supervision during activities that may pose a risk. By instilling good habits early on, you can help them stay safe and splinter-free.
5. Consider a Splinter Removal Kit
Having a splinter removal kit at home can make it easier to address minor splinters quickly. A basic kit should include:
- Tweezers for grasping the splinter
- Antiseptic wipes to clean the area
- Band-aids for covering the wound
- Needles for more stubborn splinters (if necessary)
Being prepared can help you manage splinters effectively and reduce the likelihood of complications.
By following these preventive measures, you can significantly decrease your chances of encountering splinters in the future. Remember, a little caution goes a long way in keeping your skin safe! 🛡️

Frequently Asked Questions about Splinter Removal
What is the best method for splinter removal?
The best method for splinter removal often depends on the size and location of the splinter. Common techniques include using tweezers, a needle, or even a splinter removal kit. For stubborn splinters, some people find that soaking the area in warm water can help to ease the removal process.
Are there any home remedies for splinter removal?
Yes! Many people use home remedies for splinter removal. One popular method involves using baking soda. Mixing baking soda with water to create a paste and applying it to the area can help draw out the splinter. Additionally, some individuals find that applying a small amount of honey can help soothe the skin and facilitate removal.
How can I prevent splinters in the future?
To prevent splinters, consider wearing protective gloves when working with wood or other materials that may splinter. Additionally, keeping your environment tidy and avoiding rough surfaces can help reduce the risk of splinters.
What should I do if I can’t remove the splinter myself?
If you’re unable to remove the splinter on your own, it’s best to seek professional help. A healthcare provider can safely remove the splinter and ensure that no infection occurs. You can search for splinter removal near me to find local services.
Is there a specific tool for splinter removal?
Yes, there are specialized splinter removal tools available, such as splinter forceps or kits that include various instruments designed for this purpose. These tools can make the process easier and more effective.
Can I use a splinter removal cream?
While there are creams marketed for splinter removal, they are generally not necessary. Most splinters can be removed with simple tools and techniques. However, if you have sensitive skin or are concerned about infection, a topical antibiotic cream may be beneficial after removal.
Are there any tricks to make splinter removal easier?
One splinter removal trick is to apply a piece of tape over the splinter and then pull it off quickly. This can sometimes help to dislodge the splinter without the need for tweezers. Additionally, using a magnifying glass can help you see the splinter better, making it easier to remove.
Where can I find splinter removal videos?
You can find helpful splinter removal videos on platforms like YouTube. These videos often provide step-by-step instructions and tips for effectively removing splinters.


